Marble Wall-Hung Washbasin Installation
Congratulations on your purchase of a Riluxa marble washbasin! As you proceed with the installation, keep in mind that wall materials vary. Always seek professional advice to ensure your installation is adapted to your situation and your specific sink.

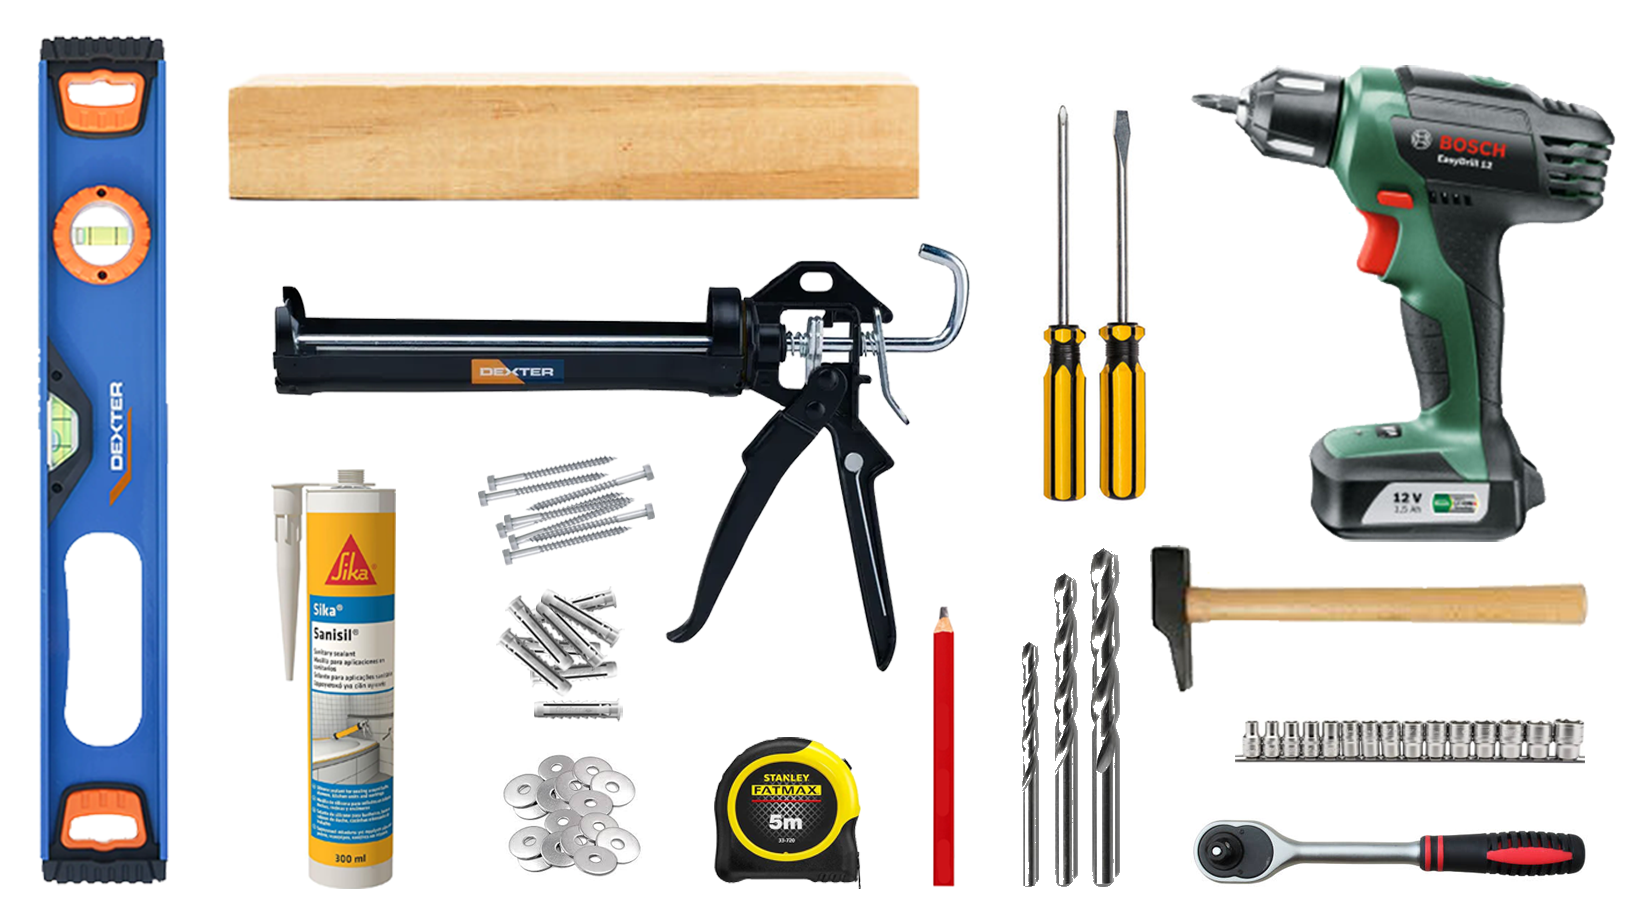
Tools Needed
- Riluxa-provided brackets (format depends on sink size)
- Drill & drill bit (appropriate for your wall)
- Washers
- Screws
- Wall plugs
- Screwdriver
- Hammer
- Utility knife
- Spirit level
- Straight plank of wood
- Tape measure
- Silicone sealant & silicone gun
- Pencil or marker
Unboxing & Inspecting your Marble Basin
- Upon delivery, promptly inspect your marble basin for any damage that may have occurred during shipping. Contact Riluxa before installation if any concerns arise.
- Our marble packaging box is 100% recyclable or reusable, make sure to dispose of it responsibly or better yet, reuse it.
- Take special care in opening the box so as not to damage your basin.
- Marble is a very heavy material. It is strongly recommended that two or more people unbox and install this product and remember to bend from the knees when lifting.
- After removing, simply place the basin in a safe place on the provided packaging to avoid any damage.
Installing the First Bracket
Note: Standard wall-mounted basin height is 80-90cm from the floor, but you should decide what best suits your situation. Consider existing plumbing to allow room for the bottle trap. It is crucial to select a drill bit appropriate for your wall material and consult a hardware expert when purchasing screws, washers and wall plugs to ensure they adequately support the weight of your sink.
- The number of brackets required depends on the size and weight of your basin, with the appropriate number for your basin supplied. In our video, we used four brackets. Determine the placement of the first bracket by considering your desired basin height and the marble thickness (usually 2cm). Place the first bracket so it’s positioned to the far left of your countertop, factoring in skirting thickness and adding a 1-2cm margin to conceal brackets. Mark the top hole. Position and correctly level the bracket and mark remaining holes.
- Drill all holes, insert wall plugs and secure the first bracket using washers and screws.
Installing the Remaining Brackets
- To determine placement of remaining brackets, consider the position of the bowl and countertop length on each side of the bowl for even bracket placement, accounting for skirting thickness and adding a 1-2cm margin to outer brackets.
- Mark the position of the additional brackets, checking continuously that they are correctly levelled. A level installation is essential for proper drainage and to prevent water pooling. Secure all the remaining brackets.
Securing & Caulking the Basin
Note: Consult a hardware professional to choose the most suitable silicone for securing and caulking your specific sink.
- At this stage you can optionally dry-fit the sink on the brackets and adjust the threaded studs (if present) up or down as needed, to regulate the height of the basin. Once perfectly level, remove the sink and keep it properly stored until final installation.
- Apply a generous bead of silicone along each bracket to create a secure bond with the basin. With assistance, gently position the basin on the brackets until it sits firmly against the wall.
- Ensure a watertight seal by applying silicone caulking to the edge of the basin, to prevent any water causing damage to your wall. Your Riluxa marble washbasin is now securely installed. Kindly wait a full day before using for the first time.
If you have any questions, please reach out to our Customer Experience Team who will be more than happy to assist you.